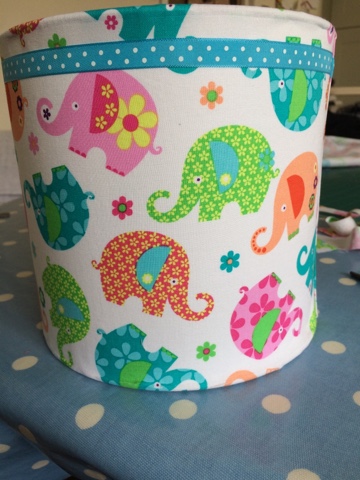
Make a lamp shade.
It seems the rage and with the sun out, spring cleaning comes to become a priority. I've made a lampshade for my daughter's room.
So easy to do...
If you have a kit... Order one from www.abisden.co.uk
It contains
2 rings - 1 has the smaller ring attached with spider legs (that's what I call them)
Double sided sticky tape
PVC inner for the lampshade - both supports the fabric and is flameproof
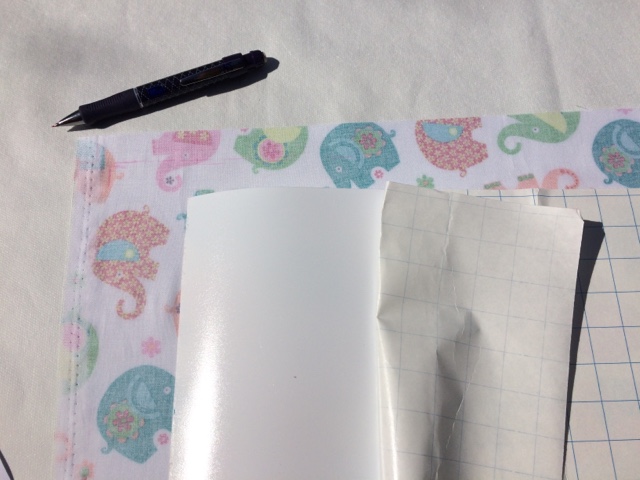
Start with pressing your fabric that measures 65cm X 70cm

I have a 70cm ribbon to match
So with the fabric cut to size, I've laid the PVC on to the back of the fabric
Draw the outline of the pvc on to the fabric so when I remove the backing I know where to lay the PVC according to the pattern I want in my shade.
(I love my Prym chalk pencil for this)

Peel off some of the backing from the PVC and start to firmly apply it to fabric. Keep the fab so smooth and ensure your threads have been cut away.
Next. Trim off the excess fabric so it is flush with the PVC.

At this point I would apply Prym's fray check to the edges. It makes the job neater.

Next.
The PVC has been scored about 1cm along the long sides. Snap this back and the PVC will break away. 

Flip the fabric over and apply the tape to where you want any ribbons or frills


Next. Apply the tape to the inside right of the shorter side of the PVC.

Apply the tape to the rings

Remove the tape from the rings and here's the tricky part..
a friend will be helpful here, otherwise take care to now roll your ring along the edges of the fabric.

I'll show my first Mistake here. I didn't press the backing to the fabric well and this is what happened when I rolled the fabric onto the rings.

Try again ... And it was fine.
Tuck the excess fabric around the ring and use this little tool that comes with your kit to push the edges of the fabric further into the rim.


Enjoy !
Abi X


Comments
Post a Comment