Using my Brother M343D Serger Overlocker (the new version of the 1034D) to make a Sewing Machine Table Mat, Doubles as an Iron Mat for my sewing table.
I've been using my little tea tray table as a small ironing table next to me while I sew.

It holds some essentials as well as providing me with easy access to a small Iron as I sew for smaller sections of my project.
Here I am going to show you how to make one for your sewing machine.


 Serge (overlock) together just the two shortest sides and the top side (away from the pocket), Here's a short video on how to serge corners.


Now start working on the pockets.
This is the shorter version. I have made a video to show you a neater method if you prefer.
For now, fold over the top long edge of the pocket piece to blind hem, and peg (or pin) down.


Overlock these folds. You can disengage the knife, or leave it in place and serge carefully, do not slice off any material if you do leave the knife in place.

Don't forget to serge the two ends of the pockes, but overlock the whole edge from the top edge.
AND finaly, overlock along the bottom to close the pockets at the bottom.


On the blue one, I sewed using a regular sewing machine, little lines along one pocket to make holders for my lint brush, tweezers, pen and seam ripper (because we all need one of those close to hand!!)


It holds some essentials as well as providing me with easy access to a small Iron as I sew for smaller sections of my project.
Here I am going to show you how to make one for your sewing machine.

First up, you need 2 contrasting fabrics of 100% cotton and a wadding that is heat proof. The fabric pieces can be as large as you need, but I have cut mine to as follows;
- Ma - calico, main fabric and Insul-Bright - 50cm x 30cm
- Calico hang for pocket pieces are 53cm by 20cm
- Main fabric - pocket 53cm by 15cm
I used Insul-Bright ...I bought this from a local etsy seller, link here...
To make the mat:
Lay out the three layers of the large pieces like so; first, the wadding with the foil side up toward wrong side of the main fabric, secondly the main fabric and lastly lay the calico on top, as shown in this image.

Peg these three together. The wadding 'creeps', that means the fabric tends to move away from the wadding as you sew. Without pinning or pegging, you'll end up with a skewed mat. But, pins are difficult to use with this kind of wadding so I have used pegs here.
 Serge (overlock) together just the two shortest sides and the top side (away from the pocket), Here's a short video on how to serge corners.

Flip the mat over and press.

Now start working on the pockets.
This is the shorter version. I have made a video to show you a neater method if you prefer.
For now, fold over the top long edge of the pocket piece to blind hem, and peg (or pin) down.


Blind hem... I have made a short video to explain this.
Press the hem flat and position this back on the shorter piece of calico.

Mark out the pockets, I just folded the pocket pieces into three and marked the two centre fold lines. See below


Overlock these folds. You can disengage the knife, or leave it in place and serge carefully, do not slice off any material if you do leave the knife in place.
Don't forget to serge the two ends of the pockes, but overlock the whole edge from the top edge.
AND finaly, overlock along the bottom to close the pockets at the bottom.


Now position the pocket upside down, and with the top edge of the pocket alongside the raw, open edge of the mat. Peg down taking care to ease away any lumps in the mat and match all edges carefully.
If you found the fabric or wadding crept, you could cut the edges slightly now to match them up.

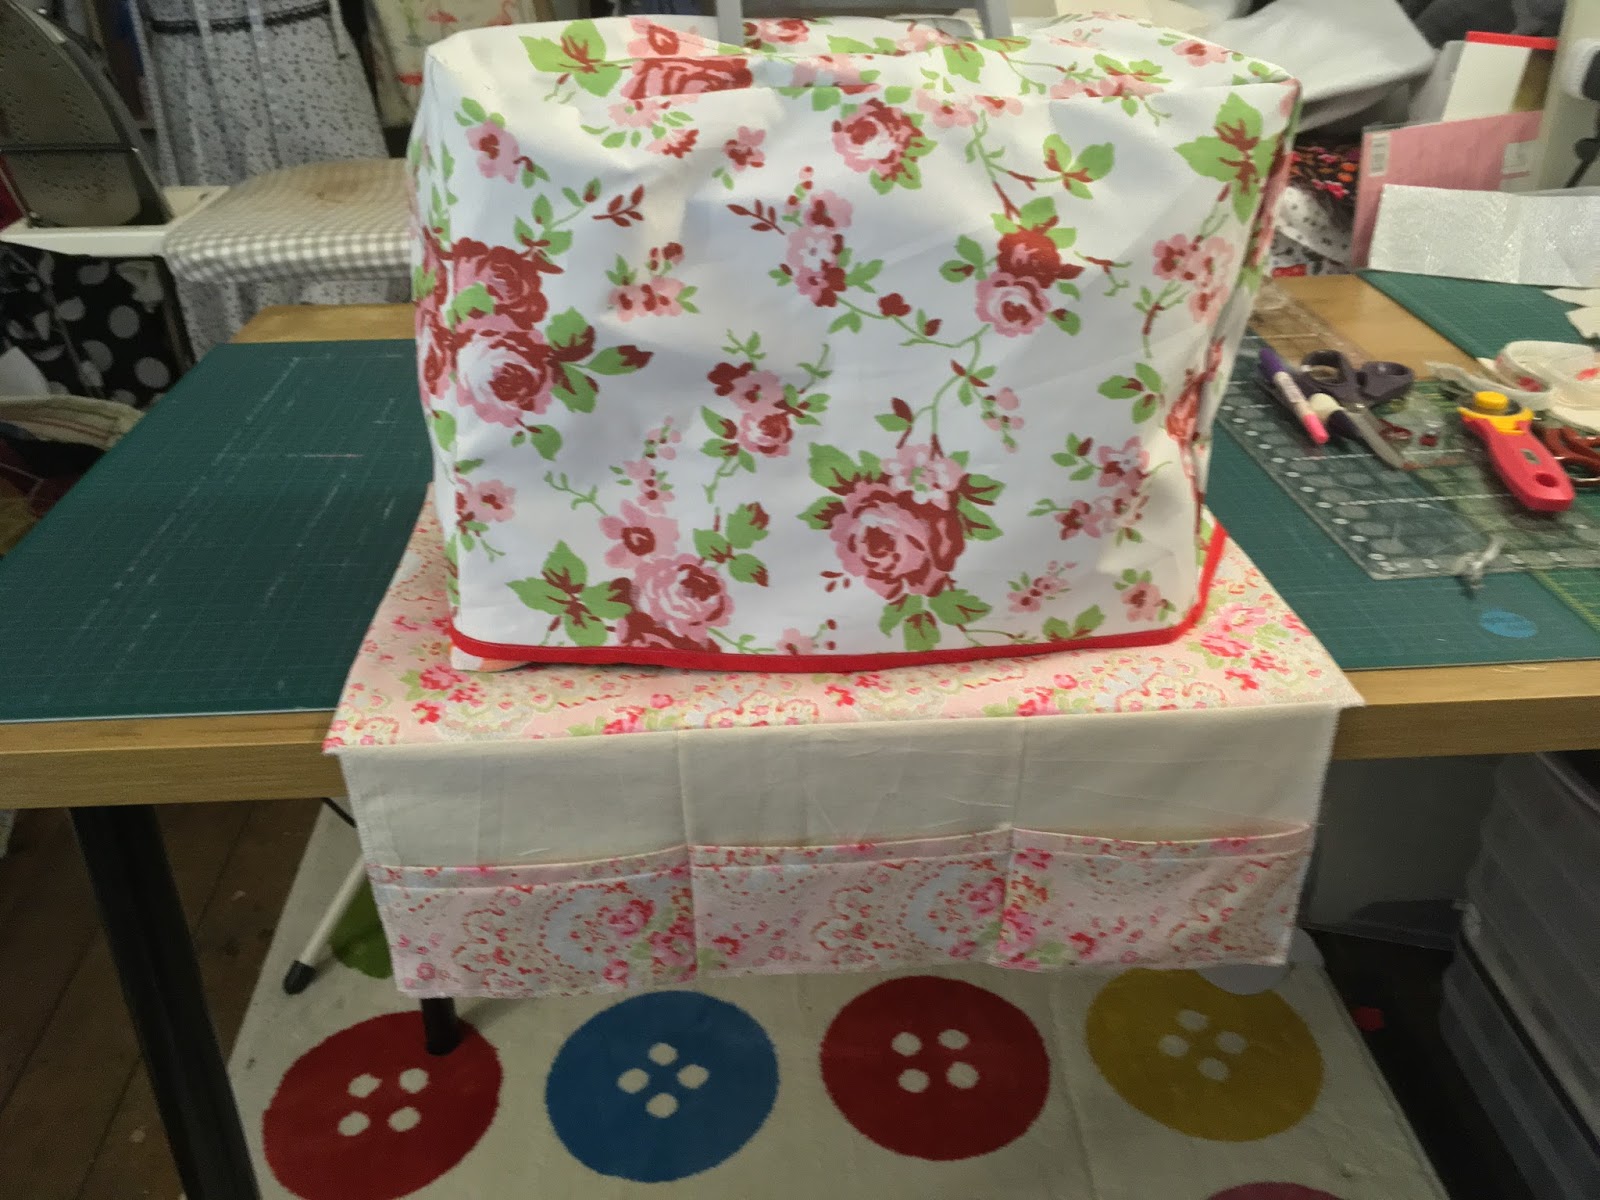
Serge along this line, and that's it! You have made yourself a neat overlocker, serger, sewing machine ironing mat!

On the blue one, I sewed using a regular sewing machine, little lines along one pocket to make holders for my lint brush, tweezers, pen and seam ripper (because we all need one of those close to hand!!)

If you look through my other blogs, you'll find this tea tray table mat/organiser that I had made earlier this year. It has glitter vinyl pockets and elastic hoops to hold my rulers. The blue flap is a pin cushion. It's lovely being organised.

Happy Sewing,
Abi x


I have just found your blog and I think what you have made is gorgeous thank you for sharing this and allowing others to copy your work
ReplyDeletekaren brown
You're welcome - please share any pictures if you do get to make one for yourself x
DeleteWell done Abi a lovely idea, I will be trying it out.
ReplyDeleteOh, please share your makes here with us x I would love to see x
DeleteHello, I have watched your video reviews of the Brother M343D and on the strength of them I have bought one. What I would like to know please is when you are only using 3 threads do you have to unthread the fourth?
ReplyDelete