Making shoes
... Or rather Espadrilles from the new Prym Range.
It'll be great when the sun finally makes a proper appearance but I'm making these lovely shoes for my gorgeous niece whom I'll be visiting this weekend. Apparently its sunny down in London.
So, here I am. Having made a dress and a toy from the range


I've decided to make a set of pink espadrilles.
The supplied leaflet is written in a multitude of languages so I always make sure I highlight the language I can follow. It saves me keeping having to look through the mass of text.

Follow the steps (haha!!) carefully. I've used lightweight iron on stabiliser; or as we know it in the UK, interfacing, to give the cotton shape and firm support to hold the gape or arch of a shoe. I've used lightweight for my niece; she's little, but for an adult, go ahead and use medium or heavy weight stabiliser.

I've only ironed the stabiliser onto one side, this will be the outer side of the shoe.
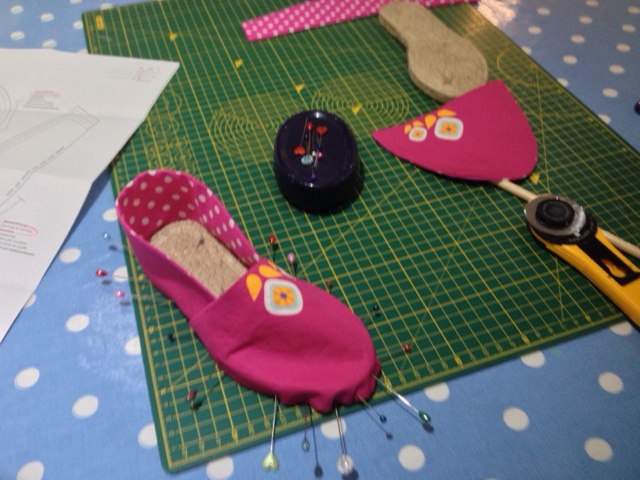
I've used a different fabric to line the espadrilles. The supplied inner fabric (unfolded piece at the top of the picture below) matches a dress my niece has, so I'll be using that to make another pair.
What do you think of the spotty Michael Miller ? It's not a bad match... (you can only see the wrong side in the image below... You'll spot it later). ...


I prefer to cut out using my rotary cutter, see how neatly it's done, and quickly...
Sew the outer and lining pieces together, right sides together, 1cm seam allowance as per instructions, but leave a 2 inch opening along a straighter edge to bring right sides out...

I've used the nifty blue tool.
Cut notches out from around the sewn edges, close to the seam line... Don't cut too close or you may cut holes in your sewing.
The clipping and notching helps shape your fabric back the other way when you flip it right side out, and takes away bulk of fabric that will otherwise get in the way.

Pin these onto the soles. Really you need your child's foot to shape around & to measure a good fit but she's not here, so we press on.

So hot right now)
So pin the back piece onto the edges of the sole and then add on the front to overlap the back. This way because it's much more pleasing to the eye when you look at the shoes from the front. It took me just over an hour to get to this point, just to give you a realistic time scale in making these shoes... but I was also watching Taylor Swift videos with my daughter and dancing slows everything down.


Comments
Post a Comment