Organiser and Desk tidy
Being organised is not my strongest trait and when I'm running classes and losing things, I might not come off very well, so it's important to me to have everything I need to hand.

Here I have 2 very useful organisers for both my sewing equipment and for my stationery and now a home for my glasses.
The large round one is a manufactured product from a well known brand which a friend purchased for me at Christmas. She knows full well I'm not a huge fan, but insisted that I would love the design of the organiser, and I do. So I have decided to make another, but a square shaped one, which my students will enjoy making too.
You will need
½ m Fabric, and ½ m lining
use and Oilcloth or PVC coated fabric, or a thick upholstery fabric that you can strengthen the structure of using a fusible (iron on) interfacing - or if you're brave enough, card from a cereal box.
perhaps binding or twill tape to finish off edges.
Teflon Foot
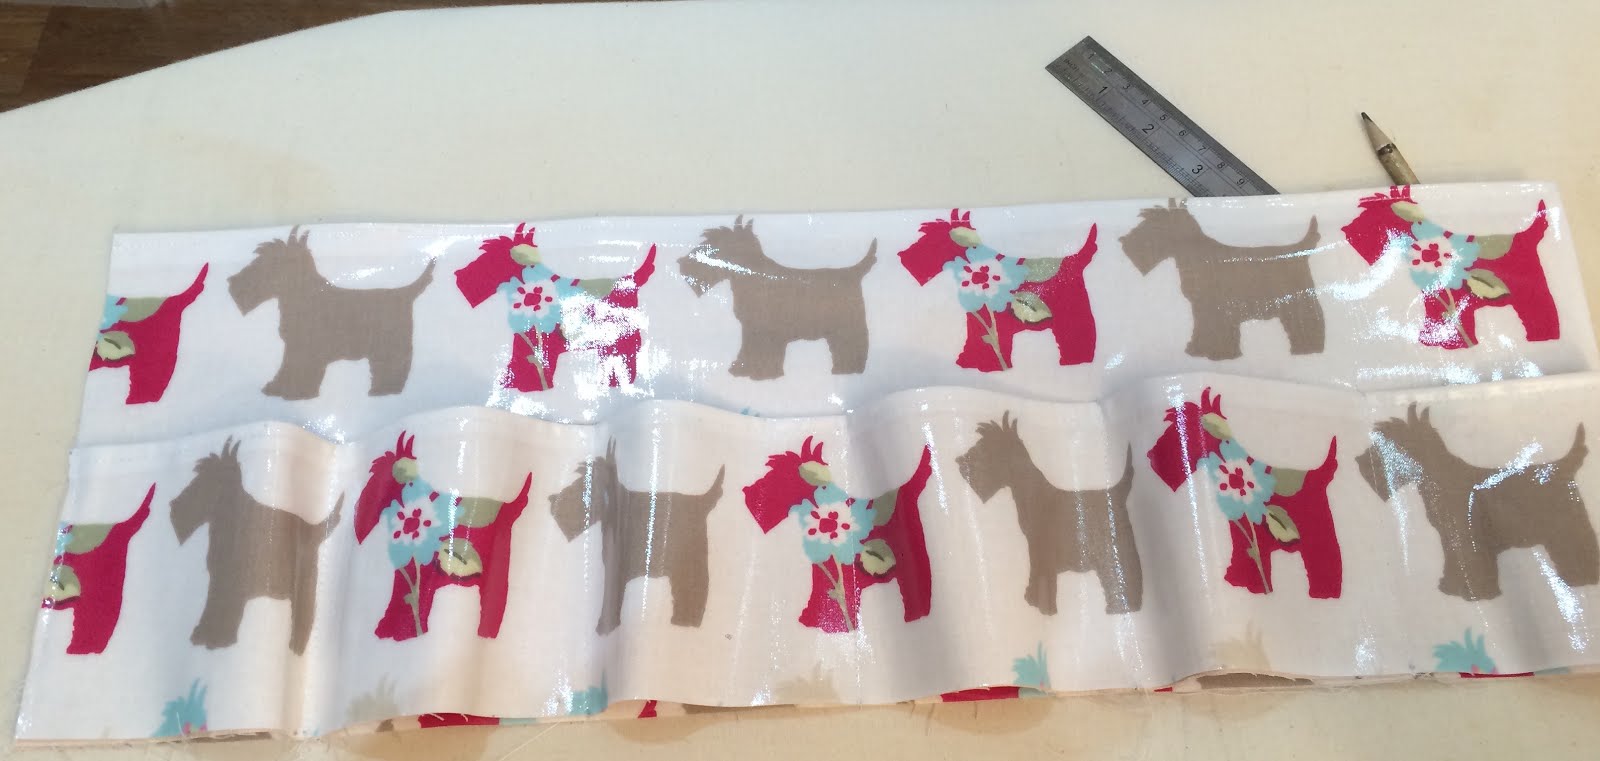
Let me quickly mention here now that if you are using a PVC coated fabric or oilcloth, then I suggest you either invest in a teflon foot (order one from www.abisden.com) or attach a piece of scotch tape to the underside of your foot. Look closely at the seams in the image, you can see the uneven stitching in using a regular metal foot where the fabric struggles to feed freely.

Cut 2 of the following shapes to make your organiser, one in the outer fabric, and one in the lining.
Base
circle -16cm diameter
or a rectangle - 12cm x 19cm
Wall and Pockets
20cm x 54cm
12cm x 66cm
2cm x 55cm
or bias binding
A seam allowance of 1cm is included in this project.

1. 20cm x 54cm
Sew the lining to the outer fabric along the top, long length with the good (pretty) sides together.
Turn and press along the seam.

2. 12cm x 66cm
Do the same as in 1. Sew the lining to the outer fabric along the top, long length with the good (pretty) sides together.
3. Measure and mark 9cm intervals along the bottom of the 20cm x 54cm length, where the pocket side seams will be sewn.
4. Measure and mark 11cm intervals along the bottom of the 11cm x 66cm length.
5. The tricky bit here is to match the 9cm marks to the 11cm marks and pin, or clip down. Clips are best used for oilcloth/PVC.

7. The ends will not have been sewn at this point, and you want to sew them altogether to form your tube (for either shaped base)
If you keep this principle in mind...

This is the way to sew the sides together, but you have sewn the pockets down, and its a bit tricky... I'm sure there's an easier method... let me know...
So, now we have a perfect tube, with the pockets in place but no base.
Here I have cut a 2cm x 55cm length of fabric to go around the base (binding tape).
 8. Pin the base to the tube, raw edge facing outward, and binding table sealing these edges. Top stitch all around, there should be a neat 1cm overlap, although I can believe it might reduce to less than 1/2cm.
And there you have it, a lovely organiser...


SIDE NOTE
I measured the circle and fabric length according to the cereal bowl I used to cut out my circular base.
Simply draw a circle...


Find a length of string to measure the circumference and add 2cm to allow for your 1cm seam allowance on either side.

And use this measurement to draw the rectangle tube for the organiser. It just so happened that I had a circumference of exactly 52cm, so with the 2cm seam allowance, I needed a rectangle of 54cm length.

I needed 2cm to allow for ease for each pocket, so I knew that 54cm would give me 6 pockets at 9cm wide each, so I needed 6 lots of 11cm for my pocket rectangle, 66cm length.
The heights I chose to match the circle organiser bought for me.
Thanks again
and share your images and ideas with me at Abi's Den Facebook page - where I regularly have giveaways and prizes!


Comments
Post a Comment