Quilted Notice Board


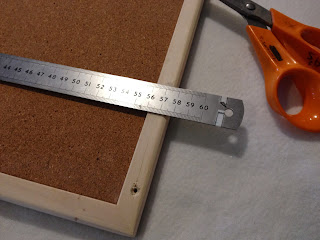
Measure the cork board cut your wadding and fabric around the board to give yourself some to wrap around to pin at the back for a neat finish.

My fabric looks quite wrinkled here, so I went ahead and gave it a good press.

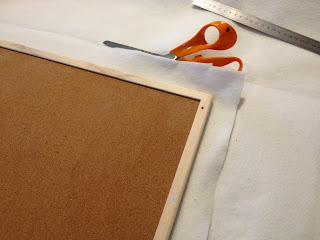
I felt that the wadding I used here was too thick to wrap around. You may decide that as well, so go ahead and cut around the board to give a flush size. If you don't have a rotary cutter (first of all! OMG! go get one, they are brilliant!) draw on the wadding, around the board and cut away the excess.
Flip the board over cover the board with the wadding and the cotton fabric.

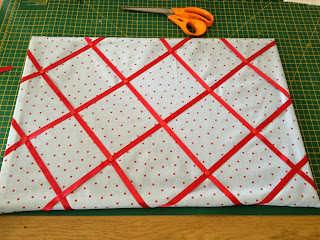
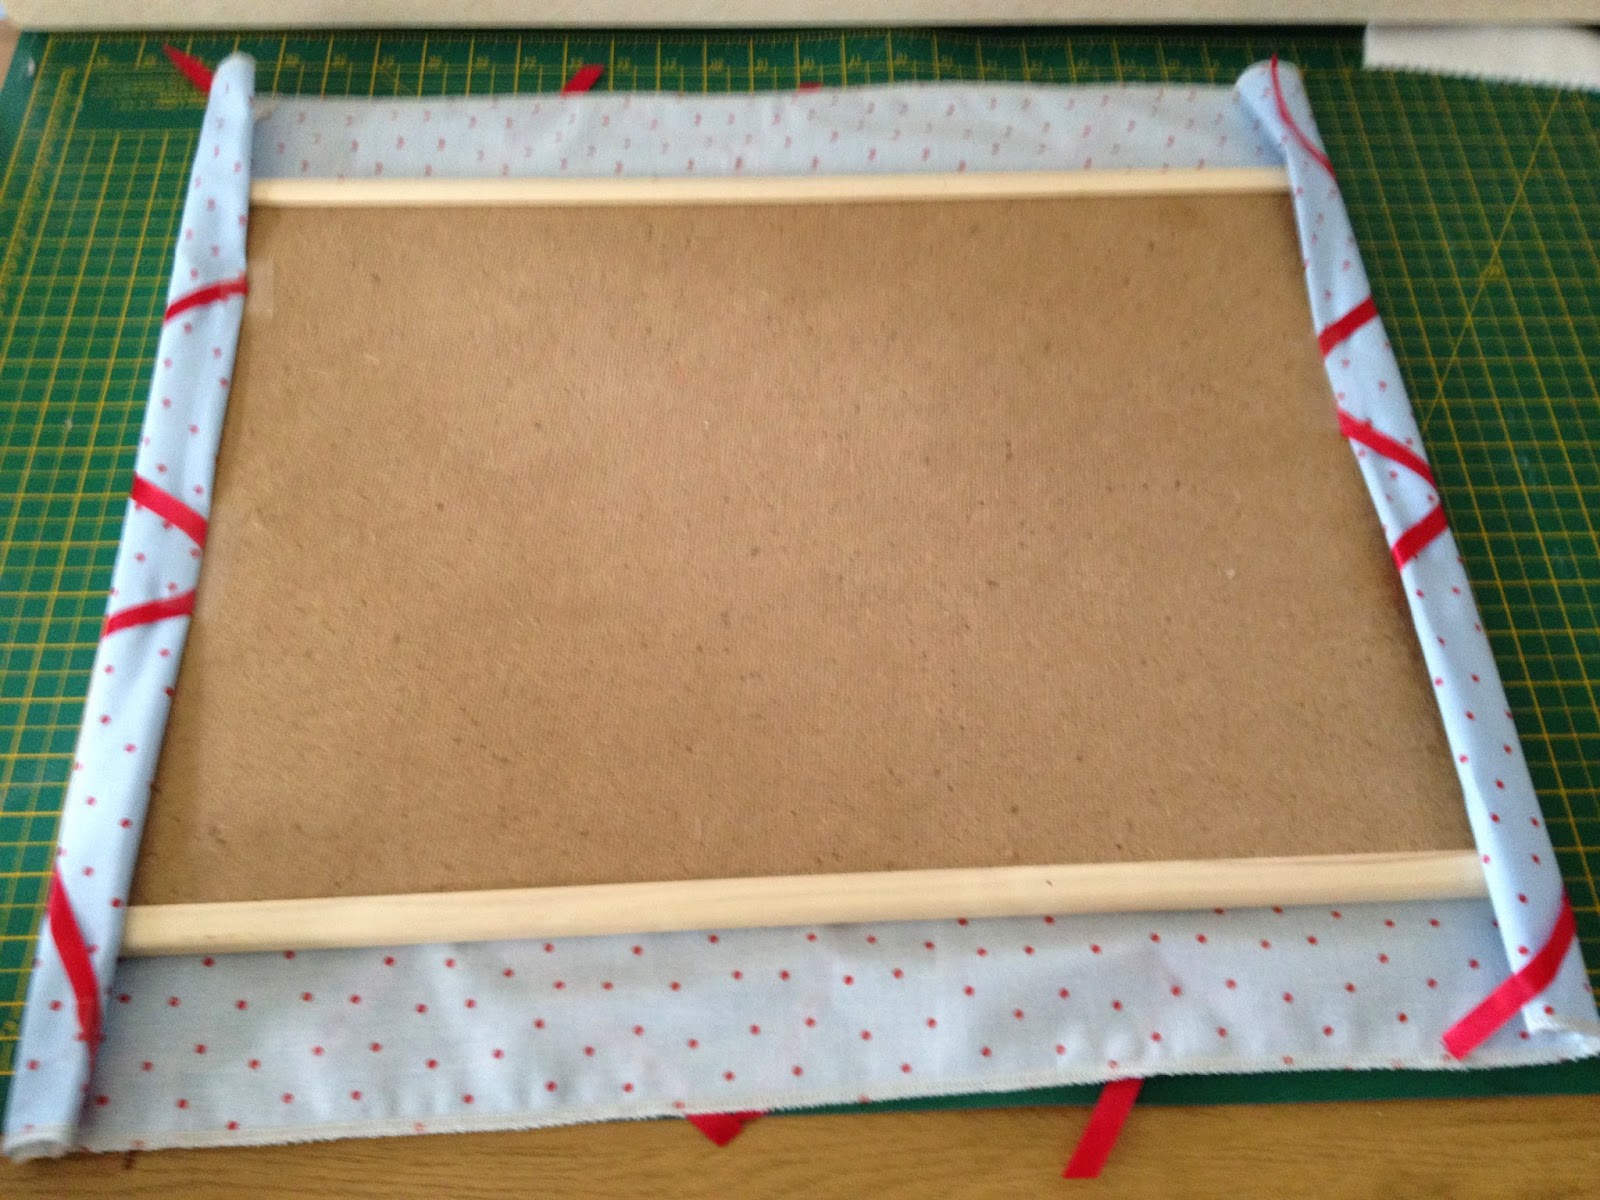
 You will need to add ribbon at an angle that suits your needs. I cut a width of A4 card to give me an long straight width piece to position my ribbon.
You need to cut the ribbon to the length of your fabric for when you turn it under at the back. It's going to add strength to your pieces for when you add notes up on there.


Flip the board over a pin the excess neatly.
I haven't shown here what I did...
I hammered small pin/nails into the board at the corners and on the ribbon crosses.
The other option is to glue gun or staple the back to the board.
Flip the board back, just be sure you're happy with where the crosses are.
I took all of the pins out and let the ribbon sit right and the re-pinned the crosses.
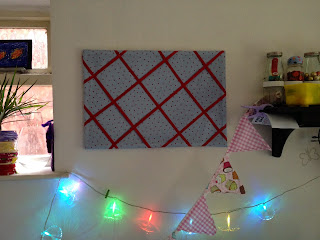
I won't be accused of managing to make up perfect squares on the board, but if you take time to ensure yours is neater, I'm sure you'll do a fantastic job!
 Enjoy.
I have always seen these lovely notice boards, and they really do lift a plain white wall, especially in my work area where I'm sitting, facing my machine and a blank wall behind.

If it's something you've decided to do as well, well, come and join me in making this very easy to make project and lets make all plain walls a bit more fun :-)
Allow about an hour for this project.

Materials: You'll need your cork board, some thin polyester wadding
cotton
ribbon and drawing pins.
You will need to hold everything together at the back. Options are:
Hammer and pins
Staple Gun
Glue Gun

Measure the cork board cut your wadding and fabric around the board to give yourself some to wrap around to pin at the back for a neat finish.


My fabric looks quite wrinkled here, so I went ahead and gave it a good press.

I felt that the wadding I used here was too thick to wrap around. You may decide that as well, so go ahead and cut around the board to give a flush size. If you don't have a rotary cutter (first of all! OMG! go get one, they are brilliant!) draw on the wadding, around the board and cut away the excess.
Flip the board over cover the board with the wadding and the cotton fabric.

 You will need to add ribbon at an angle that suits your needs. I cut a width of A4 card to give me an long straight width piece to position my ribbon.
You need to cut the ribbon to the length of your fabric for when you turn it under at the back. It's going to add strength to your pieces for when you add notes up on there.

The cross sectional pieces have been woven up and under the first row of ribbon. It just adds a very indiscreet finish to the board, but it will also enable notes to be held in place a bit should a pin fall out.
At this point you can go and add the drawing pins at the cross points of the ribbon. If you use new, sharp pins, they shouldn't damage the ribbon.
At this point you can go and add the drawing pins at the cross points of the ribbon. If you use new, sharp pins, they shouldn't damage the ribbon.
Flip the board over a pin the excess neatly.
I haven't shown here what I did...
I hammered small pin/nails into the board at the corners and on the ribbon crosses.
The other option is to glue gun or staple the back to the board.

Flip the board back, just be sure you're happy with where the crosses are.
I took all of the pins out and let the ribbon sit right and the re-pinned the crosses.

I won't be accused of managing to make up perfect squares on the board, but if you take time to ensure yours is neater, I'm sure you'll do a fantastic job!


Comments
Post a Comment